

 Back to Blogs
Signs Siding Needs Replacing: What to Notice Before You Decide
Key Takeaways
-
Judge fading by its companion symptoms: Color loss alone may be an appearance issue. Color loss with chalking, brittleness, cracks, peeling, bubbling, or loose material calls for a closer look.
-
Map the extent and recurrence: One contained defect creates a different repair question than similar damage across several walls or a problem that keeps returning.
-
Act promptly on moisture or soft-area clues: Active leaks, interior stains, soft areas, widespread deterioration, or suspected pest damage should not wait for a routine maintenance review.
Faded siding does not automatically need to be replaced. The more useful question is whether the color change stands alone or appears with physical damage, moisture clues, loose material, or an increasingly demanding maintenance routine. Those combined conditions are more meaningful signs siding needs replacing—or at least needs a professional assessment—than fading by itself.
Homeowners can begin by separating appearance changes from contained damage and potentially urgent symptoms. That prevents a blemish from automatically becoming a whole-home replacement project while ensuring that moisture clues, recurring failures, and widespread deterioration receive appropriate attention.
Start With a Safe, Ground-Level Siding Walk-Around
A useful siding inspection does not require removing panels, probing questionable areas, or climbing a ladder. Stay on stable ground, record what is visible, and leave inaccessible or invasive inspection to a qualified professional.
Walk around the home in the same direction each time, dividing it into front, back, left, and right elevations. Take one wide photograph of each elevation before capturing close-ups. The wide shot preserves the location and pattern; the close-up records the condition.
1. Compare the main wall surfaces
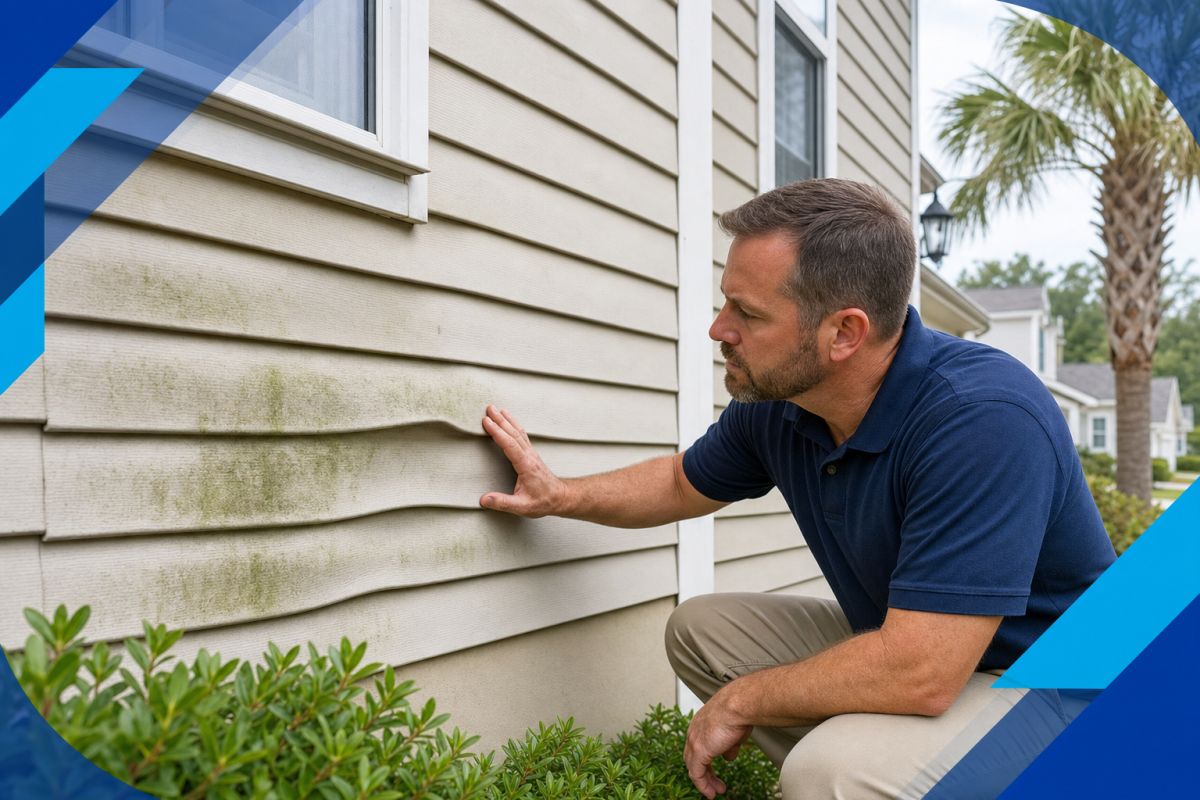
Stand far enough back to notice patterns. Look for uniform fading, isolated discolored patches, rippling, buckling, gaps, missing sections, cracks, holes, or panels that appear out of alignment. Note whether a condition affects one small spot, one wall, or multiple elevations.
This first distinction can change the decision. One damaged area may support a targeted repair discussion, while similar defects scattered around the home suggest a broader condition worth assessing.
2. Check transitions around windows and doors
Look where siding meets window and door trim. Note visible gaps, displaced material, staining, peeling finishes, or changes concentrated beneath an opening. Then check the corresponding indoor areas for stains, bubbling paint, peeling finishes, or other changes that should be included in your photo record.
3. Follow corners, trim, and penetrations
Continue along inside and outside corners, trim boards, vents, utility penetrations, hose connections, and other places where materials meet. A wall can look acceptable across its broad surface while showing movement, gaps, or deterioration at its edges.
4. Look along the ground line
Inspect the lowest visible siding and trim without digging or pressing on the wall. Watch for holes, staining, damaged edges, displaced sections, soft-looking material, or areas where growth and discoloration repeatedly return after cleaning.
If vegetation, stored belongings, or another obstruction prevents a clear view, note that location instead of reaching into an unsafe or inaccessible area.
5. Match exterior observations with indoor clues
After the walk-around, check rooms behind the suspect walls. Record stains, peeling or bubbling finishes, soft areas, or persistent musty odors. Note the approximate relationship between the indoor observation and the exterior defect so a professional can evaluate both.
Fading: When It Is Mostly an Appearance Issue—and When It Is Not
Uniform color change that has developed gradually, with the siding remaining intact and aligned, may primarily affect curb appeal. Start by comparing different elevations in similar lighting. Full sun and deep shade can make two otherwise similar surfaces look significantly different in photographs.
Look at less-exposed areas where trim, shutters, or another feature may have shielded part of the siding. This can help you understand the degree of color change, although it does not determine the condition of the material by itself.
Fading deserves closer assessment when it appears with:
- Chalky residue or recurring surface deterioration
- Cracks, holes, splitting, or brittle-looking areas
- Peeling, flaking, blistering, or bubbling finishes
- Warping, rippling, buckling, or loose sections
- Painting or touch-up work that repeatedly fails
- Soft areas, staining, or nearby interior moisture clues
This paired-symptom rule keeps color change in perspective. Stable siding with uniform fading may leave the homeowner with an appearance decision. Fading combined with physical deterioration or repeated finish failure creates a condition question as well.
Uneven color can also complicate a localized repair. A new panel may be compatible and functional but still stand out against older, faded material. That visual difference does not automatically require whole-home replacement, but it may affect which scope the homeowner considers acceptable. Ask an estimator to separate repair feasibility from color-matching expectations.
Localized Damage vs. Warning Signs That Should Not Wait
Cracks, holes, loose panels, warping, buckling, and deterioration do not carry the same urgency in every situation. Use the extent, location, rate of change, and related interior evidence to decide what to do next.
Observe and document a stable, isolated condition
A small cosmetic mark or apparently isolated defect with no related interior symptoms can begin with dated photographs. Capture a close-up and a wider image showing its location. Recheck it periodically for movement, spreading cracks, new staining, or repeated displacement.
Request a repair-or-replacement assessment
Arrange an assessment when a cracked or loose area will not stay corrected, several defects appear on one wall, damage is visible around multiple openings, or panels look warped or buckled. Fading paired with brittleness, surface failure, or repeated touch-up work also belongs in this category.
Holes deserve attention based on their size, location, number, and surrounding condition. One contained defect may be repairable. Repeated holes, damage extending into neighboring materials, or suspected pest activity can broaden the necessary scope.
Seek prompt evaluation
Do not postpone evaluation when you find an active leak, rapidly expanding interior stain, soft area, widespread rot or decay, persistent musty odor, extensive bubbling or peeling inside, or suspected pest damage.
These symptoms can involve more than the visible siding surface. An interior stain or soft area does not identify the source by itself because water can travel and other building components may be involved. Prompt evaluation is intended to find the source and appropriate scope rather than assume the siding is responsible.
The Maintenance-Burden Test: Is the Same Work Coming Back?
A single repair may remain practical. A pattern of painting, patching, cleaning, caulk-related attention, or trim work provides more useful evidence that the maintenance burden is changing.
There is no universal number of repairs or dollar threshold that works for every home. Instead, ask four questions:
- Does the work return in the same place? Repeated attention to one transition, opening, or wall section may mean earlier work corrected the visible result without ending the pattern.
- Is the problem spreading? A condition expanding across a wall is different from a one-time defect that remains contained.
- Are seemingly separate tasks connected? Repainting, stain removal, trim repair, and interior touch-ups around the same location may be parts of one recurring issue.
- Does maintenance produce a stable result? Continued care may be reasonable when it restores a manageable exterior. Replacement becomes more useful to compare when the improvement is brief or deterioration continues.
Create a maintenance record before requesting estimates. Include the date and location of each repair, what was done, who completed it if known, repainting history, recurring cleaning locations, known leaks, interior repairs, and photographs from before and after the work. Receipts and leftover product labels may also help identify the existing material.
This history keeps a consultation from focusing only on the newest crack. It helps show whether the home has one contained defect or a recurring exterior-wide burden.
A Six-Factor Framework for Repairing or Replacing Siding
An online checklist cannot reveal concealed conditions, but it can help you compare recommendations and ask why a contractor is proposing a panel repair, one-elevation project, or whole-home replacement.
- Extent: Map whether the problem is limited to one area, repeated across one wall, or present on several elevations. A contained defect with sound neighboring material is a stronger repair candidate than widespread cracking, buckling, or deterioration.
- Recurrence: Compare the current condition with your repair history. A first-time defect should not be evaluated the same way as damage that repeatedly returns or spreads to new locations.
- Transitions: Review the condition around windows, doors, corners, trim, penetrations, and lower edges. Multiple affected transitions may point to a broader scope than one damaged field panel.
- Interior evidence: Include stains, soft areas, peeling finishes, or odors in the assessment. These clues may require investigation before anyone can determine whether a surface repair is sufficient.
- Material availability and appearance: Ask whether compatible siding can be obtained and whether disturbing adjacent pieces will affect the scope. Consider color and texture matching separately from technical compatibility.
- Maintenance demands: Decide whether a proposed repair is likely to restore a stable, manageable exterior or continue a cycle of patching, repainting, and related work.
Consider a home with one visibly damaged panel and sound surrounding material. A targeted repair may be reasonable if compatible material is available and there are no related symptoms. If the same home has similar damage on several walls, repeated past repairs, and interior staining near an affected opening, replacement becomes more important to compare.
Ask each estimator to identify the observation supporting the recommended scope. The proposal should clarify whether it covers one section, one elevation, or the entire home and how windows, doors, trim, accessories, and penetrations will be handled.
Concealed deterioration cannot be confirmed from surface observations alone. Before work begins, ask how unexpected conditions will be documented, explained, and addressed if they become visible after material is removed.
If Replacement Fits Better, Compare Upkeep and Product Details
Color matters, but it should not be the only comparison point—especially when recurring painting or finish repairs helped lead to the decision. Review the care required by the specific product, the components included in the proposed system, and the treatment of exterior transitions.
Window World of Savannah offers several siding lines rather than one universal option. As a supported lower-upkeep example, its 2000 Series is described as weather-resistant vinyl that is easy to maintain and does not chip, flake, or blister like painted surfaces. Homeowners trying to leave a recurring painted-finish cycle can explore Window World 2000 Series siding and compare that characteristic with their priorities.
The 6000 Series is an insulated vinyl option. Its product information connects the added insulation with energy savings, but homeowners should ask how the complete product and proposed installation apply to their home rather than assume a specific result.
The company’s 1000, 1500, 2000, 4000, and 6000 Series product pages state that the siding carries a transferable lifetime limited warranty. Request the applicable warranty document and review its coverage, exclusions, maintenance requirements, and transfer conditions instead of relying on the warranty label alone.
Bring these questions to a siding consultation:
- What routine cleaning and maintenance does this specific siding require?
- Which components and accessories are included besides the main panels?
- How will windows, doors, corners, trim, vents, and utility penetrations be handled?
- Is added insulation part of the product, and how does it apply to this house?
- Which product specifications matter for the property and proposed installation?
- What does the applicable warranty cover, and what responsibilities apply to the homeowner?
- How will concealed deterioration be documented if it is found?
Prepare for a More Useful Siding Consultation
Organize photographs by elevation, label close-ups with their approximate locations, and include dates when possible. Add your repair and painting history, known leaks, recurring stains or growth, interior observations, receipts, and any available information about the existing siding.
Tell the estimator whether your primary concern is active damage, repeated maintenance, appearance, difficult material matching, or a combination of these. This context helps keep the proposed scope and product selection connected to the reason you are considering replacement.
Window World of Savannah offers free quotes and in-home or virtual consultations. Based at 66 Columbia Drive in Pooler, the company serves homeowners in Pooler, Savannah, coastal Georgia, and the South Carolina Lowcountry. Bring your photo log and maintenance history to compare available siding options and identify which conditions require an onsite evaluation.
Frequently Asked Questions
-
A localized repair may be reasonable when the damage is contained, surrounding material remains sound, and compatible replacement material is available. Ask about the effect on neighboring panels and whether fading will make the repair visibly different.
-
Take one wide photograph of each wall, followed by close-ups of fading, cracks, holes, loose panels, stains, warping, and damaged transitions. Include related interior observations and label each image with its location and date.
-
Start with what you can verify. Create a current photo record, note when you first observed each condition, and collect any receipts, labels, or leftover materials you can find. Mark unknown dates and past work as unknown rather than estimating them.