

 Back to Blogs
Signs Your Windows Need Replacing Before Fall Installation: A Planning Guide
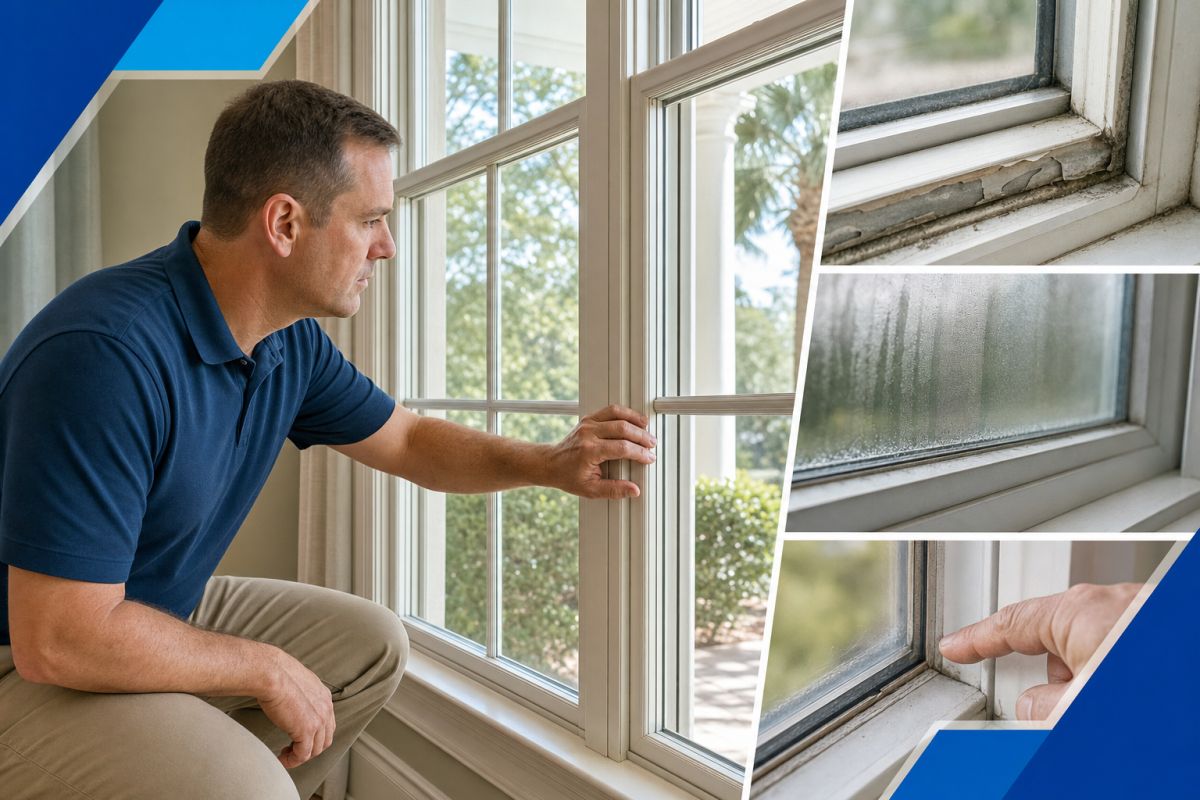
The clearest signs your windows need replacing before fall installation include persistent fog between panes, cracked glass, recurring drafts, moisture damage, deteriorated frames, and windows that no longer open, close, stay open, or lock properly. These symptoms warrant investigation, but the appropriate response could involve maintenance, repair, warranty review, or replacement.
If fall is your preferred installation period, inspect and document your windows before you want the work completed. Consultation, product selection, measurements, ordering, and scheduling may all occur before installation, and timing varies by project.
Key Takeaways
-
Inspect and document glass, frame, moisture, operation, locking, and comfort concerns one room at a time.
-
Confirm whether condensation is on the indoor surface, outdoor surface, or trapped between panes.
-
Prioritize broken glass, active leaks, deteriorating materials, and windows that cannot close or lock properly.
-
Begin the evaluation process before your preferred fall timing narrows; scheduling and project requirements vary.
Start With a Room-by-Room Window Check
A quick walk through the house can miss patterns. Instead, inspect one room at a time and record each window separately. Two windows that look identical may have different symptoms because of their condition, placement, hardware, or surrounding materials.
Choose a time when you can see both the interior glass and the accessible exterior portions clearly. Keep the inspection at ground level or within safe reach. There is no need to climb or remove window components for this initial check.
Use five inspection categories
- Exterior condition: From a safe position, look at the visible frame, sash, seams, caulk, and weep holes. Note gaps, damaged finishes, deterioration, or apparent blockages without trying to diagnose the source from one clue.
- Interior condition: Examine the trim, sill, wall, and nearby finishes. Record stains, peeling or bubbling paint, softness, visible deterioration, or recurring odors.
- Glass and seals: Look for cracks, chips, haze, and condensation. Identify whether moisture appears on the indoor surface, outdoor surface, or between panes.
- Operation and safety: Open, close, and lock the window normally. Note sticking, excessive looseness, a sash that will not stay in position, or a lock that does not engage. Do not force resistant parts.
- Comfort symptoms: Record drafts, recurring hot or cool spots, or noticeable outdoor noise. Include when the symptom is most obvious instead of treating a one-time observation as a diagnosis.
Create a simple window-problem worksheet
Your record can be a note on your phone, a spreadsheet, or a printed page. Use one row for each window and include:
- Room and window location, such as “kitchen window over sink”
- Observed symptom
- When it happens, such as after rain or during a certain part of the day
- Whether it affects moisture control, operation, locking, or comfort
- Date inspected
- Photo or short video taken
- Any known product, installation, or warranty information
Specific wording makes the record more useful. “Bedroom is uncomfortable” is difficult to evaluate. “The left bedroom window feels drafty around the lower edge when it is closed and locked” identifies what happened, where it happened, and under what condition.
Photograph stains, bubbling finishes, fogged glass, damaged caulk, frame deterioration, and hardware that will not align. Take one wider photo to show the window’s location and one close-up of the symptom. If moisture appears only under certain conditions, date the image and note the recent conditions rather than trying to recreate the problem.
Check the Glass: Cracks, Haze, and Three Types of Condensation
“Condensation” can describe moisture in three different places. The location matters because not every form points to an insulated-glass seal problem.
Condensation on the room-side surface
If moisture can be wiped from the indoor surface, it is not trapped between the panes. Interior condensation can be related to indoor humidity and surrounding conditions. Record which rooms are affected, how often it appears, and whether it is widespread or limited to one window.
Persistent surface moisture still deserves attention if it contributes to wet trim, stains, or damaged finishes. Its presence alone, however, does not establish that the insulated-glass unit has failed.
Condensation on the exterior surface
Moisture on the outdoor face of the glass is also different from moisture inside an insulated-glass unit. Confirm the location before reporting “fog between the panes.” Exterior condensation by itself is not evidence of a failed seal.
Haze or moisture trapped between panes
If fog, haze, or droplets remain between panes and cannot be wiped from either surface, an insulated-glass seal issue is possible. Photograph the affected area and note whether its appearance is constant or changes through the day. Those details will help frame the discussion about the glass unit, applicable warranty terms, and available repair or replacement options.
Cracked or broken glass
Keep people and pets away from cracked or broken glass. Avoid operating the window if movement could disturb the damaged glass, and arrange an evaluation instead of assuming a small crack will remain unchanged.
Test Operation and Locks Without Forcing the Window
Open and close each operable window using its normal handle, lift rail, or hardware. A window that sticks, drops, will not stay open, or refuses to close completely may have an issue involving its alignment, hardware, sash, or frame.
Next, close the window and test the lock normally. Record whether the lock engages fully and whether the sash appears to sit correctly. Do not force a sash or apply extra leverage to a lock. Doing so may damage components without revealing why they are misaligned.
Give higher priority to a window that cannot be secured or operated dependably, especially where the opening may be needed for emergency exit access.
Look for Moisture Clues Around the Frame and Trim
Water symptoms often appear around the window rather than on the glass. Check the interior sill, trim, wall, and floor for staining, bubbling paint, peeling finishes, softness, swelling, visible deterioration, or a recurring odor. Outside, visually inspect accessible seams, caulk, frame surfaces, sash areas, and weep holes.
Pay attention to timing. A stain that changes after rain provides different information from an old, dry mark that has remained unchanged. Photograph active moisture when you notice it, then record the date and affected area.
Visual clues cannot confirm the exact path water took. A failed surface seal, deteriorated material, surrounding construction, or another water-management issue may produce symptoms in the same area. Covering a stain with paint or adding caulk without identifying the source can hide evidence while leaving the underlying problem unresolved.
Notice Comfort Changes, Drafts, and Outdoor Noise
Compare similar windows under normal household conditions. Close and lock each window, then note whether you feel air movement around an edge or see an obvious gap. Record whether the concern changes with the weather, occurs continuously, or is limited to one side of the opening.
A recurring hot or cool spot or a noticeable change in outdoor-noise intrusion can help identify which window deserves closer attention. The most useful evidence is a pattern: for example, a closed and locked window with a visible gap, a recurring edge draft, and a consistent comfort difference from nearby windows.
Do not use a candle, lighter, or burning incense to test for air movement around curtains, blinds, paper, or other combustible materials. Visual checks and a professional assessment avoid the unnecessary open-flame risk.
Energy bills require similar caution. Weather, energy rates, thermostat settings, equipment condition, and household use can all affect costs. A bill change is more useful as a reason to inspect than as proof that a particular window is responsible.
Use a Three-Level Window Urgency Framework
Prioritize each finding according to its effect on safety, security, moisture control, operation, and comfort. This three-level framework helps separate immediate concerns from problems that can be documented and discussed during a planned evaluation.
Level 1: Request prompt professional attention
- Broken or significantly cracked glass
- Active water entering around the window
- Soft, deteriorating, or visibly damaged frame or trim material
- A window that cannot be closed or locked securely
- A window that cannot operate dependably where exit access matters
Address the immediate safety, security, or water-related concern rather than postponing it solely to match a preferred seasonal installation plan.
Level 2: Schedule an evaluation
- Persistent haze or condensation trapped between panes
- Recurring drafts after the window is fully closed and locked
- Repeated sticking, alignment, or hardware problems
- Consistent hot or cool spots near particular windows
- Recurring stains or surface condensation without active water entry
These patterns may lead to a maintenance, repair, warranty, or replacement discussion. The assessment should identify which part of the window or surrounding area is involved before a remedy is selected.
Level 3: Ask a maintenance or warranty question
- An isolated surface-caulk concern without visible interior damage
- A minor operation change that has not persisted
- Interior-surface condensation without moisture between panes
- A cosmetic concern that does not affect glass, operation, locking, or surrounding materials
Keep these findings in your room-by-room record so you can see whether they recur or worsen. If you know the manufacturer, approximate installation date, or installer, gather those records. Warranty eligibility and coverage depend on the specific product and terms.
Plan Ahead for a Smoother Fall Window Project
A preferred fall installation begins with investigation and planning rather than a universal lead-time estimate. Use this sequence to move from vague concerns to a project discussion with useful information in hand.
- Inspect, prioritize, and organize: Complete the room-by-room check, flag Level 1 concerns, and label your photos by room and window location.
- Request a consultation and define the scope: Explain whether you are concerned about one opening, several problem windows, or a broader replacement project. Ask whether an in-home or virtual consultation is appropriate for the initial conversation.
- Match options to the documented needs: Discuss operating style, material, appearance, and available impact-window options where relevant. Ask how each proposed option addresses the condition and required operation of that opening.
- Confirm measurements and ordering steps: Ask which decisions must be final before ordering and whether another measurement appointment is required.
- Discuss fall scheduling and weather procedures: Ask about current availability, factors that could change a planned date, and how weather-related updates are communicated.
- Review written project details: Confirm product specifications, project scope, financing terms if financing is used, and the warranty terms applicable to the selected products and work.
Questions to bring to the consultation
- Does this symptom appear limited to the glass, hardware, frame, or surrounding materials?
- What findings support maintenance, repair, warranty review, or replacement?
- Should any window be addressed before the rest of the proposed project?
- Which option fits the required operation and the condition documented at this opening?
- What measurements and product decisions are required before ordering?
- What is the current scheduling process, and what could change the planned installation date?
- How are unsuitable weather and schedule updates handled?
- What warranty terms apply to the specific product and project?
Prepare the household after an installation date is coordinated
Follow the installer’s project-specific directions. Clear access to the inside of each window, move fragile belongings and nearby decorations, and ask whether furniture or window treatments need to be moved. Confirm who is responsible for each task rather than removing unfamiliar hardware yourself.
Plan a secure area for pets and keep children away from work zones. Confirm how the crew will access the home, where vehicles may park, and whether someone must be present. A concise room list matching each planned window to its location can also prevent confusion on installation day.
Discuss Your Window Concerns Before Your Preferred Fall Timing Narrows
Window World of Savannah offers vinyl, premium wood-clad, and impact replacement-window options, along with in-home and virtual consultations. Bring your room-by-room notes and photos so the discussion can focus on the conditions you observed, suitable product options, and current scheduling availability.
Financing is available with approved credit through the Window World Credit Card Program. Window World of Savannah also states that it provides comprehensive warranties intended to offer peace of mind. Review current financing information and confirm the coverage and terms for the specific products and project you select.
Frequently Asked Questions
-
A virtual consultation can provide an initial opportunity to share dated photos, videos, room locations, and notes about when the symptom occurs. Ask whether an in-home visit or additional measurements will be needed before product or project decisions are finalized.
-
Weather procedures vary. Ask before installation how weather decisions are made, when schedule updates are communicated, and whether you should continue preparing the work areas until a change is confirmed.
-
Yes, if it is available. Gather the manufacturer, approximate installation date, receipts, and warranty documents. Coverage depends on the product and its terms, so the paperwork can make a warranty discussion more specific.